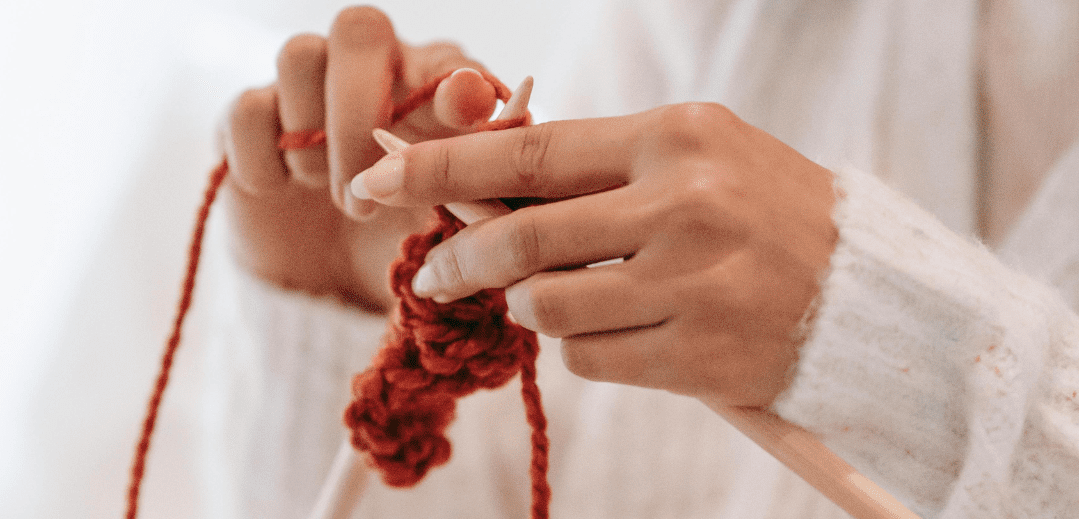
How to Read Knitting Patterns staring at your first knitting pattern can feel like trying to decipher a secret code. Those mysterious abbreviations, cryptic symbols, and numbers scattered throughout the instructions might seem overwhelming at first glance. But here’s the encouraging truth: knitting patterns follow logical, consistent conventions that become second nature once you understand the fundamentals.
Think of knitting patterns as recipes for your favorite dishes. Just as recipes provide ingredients, measurements, and step-by-step cooking instructions, knitting patterns supply everything you need to recreate a specific project. Once you learn to read this specialized language, an entire world of knitting possibilities opens before you from simple scarves to intricate sweaters, from cozy blankets to delicate lace shawls.
How to Read Knitting Patterns this comprehensive guide demystifies every component of knitting patterns, breaking down complex concepts into digestible pieces. Whether you’ve just learned to cast on or you’re ready to tackle your first pattern-based project, this tutorial provides the foundation you need to read patterns with confidence and accuracy.
Understanding the Anatomy of a Knitting Pattern
Every well-written knitting pattern follows a standard format, though designers may arrange sections slightly differently. Familiarizing yourself with these standard components helps you navigate any pattern you encounter.
The Materials Section: Your Shopping List
The materials section functions as your complete shopping list for the project. This critical section specifies exactly what supplies you need before beginning.
Yarn requirements detail the specific yarn used in the sample, including brand name, colorway, and fiber content. Most importantly, this section lists the yarn weight category and the total yardage required. Even if you substitute a different brand, matching both the weight category and total yardage ensures your finished project will measure correctly.
Needle specifications tell you which needle sizes the designer used and what type—straight, circular, or double-pointed. Some patterns require multiple needle sizes to achieve different gauges for various sections. The pattern will clearly indicate when to switch between sizes.
Additional notions might include stitch markers, tapestry needles, cable needles, buttons, or other project-specific accessories. Don’t skip this section—discovering you need stitch markers halfway through a complex lace pattern creates unnecessary frustration.
Gauge: The Most Important Number You’ll Encounter
Gauge indicates how many stitches and rows fit into a specific measurement, typically four inches square. This seemingly simple measurement determines whether your finished project will fit as intended or turn into an unusable disaster.
For example, a pattern might state: 20 stitches and 28 rows = 4 inches in stockinette stitch. This tells you that when you knit stockinette stitch with the recommended yarn and needles, you should achieve exactly 20 stitches across and 28 rows down in a four-inch square.
Why does gauge matter so dramatically? Consider a sweater pattern designed for 20 stitches per four inches. If your tension produces 22 stitches per four inches instead, you’re creating smaller stitches. Over the 200 stitches around a sweater body, that two-stitch difference compounds into several inches of size discrepancy. Your supposedly medium sweater might fit like a small or even an extra-small.
Always knit a gauge swatch before starting any project where finished size matters. Create a square larger than four inches, then measure the center portion to avoid edge distortion. If your gauge doesn’t match the pattern, adjust your needle size—larger needles for fewer stitches per inch, smaller needles for more stitches per inch.
Sizing and Finished Measurements
Patterns for garments typically offer multiple sizes, often ranging from extra-small through extra-extra-large or beyond. The sizing section shows finished measurements for each size option, allowing you to select the best fit.
Pay careful attention to finished measurements versus body measurements. A sweater with a 40-inch finished chest measurement doesn’t fit a 40-inch chest—it would be skin-tight. Most garments include ease, which is extra room beyond your actual measurements. Positive ease creates a looser fit, while negative ease produces a tighter, more fitted garment.
Schematics provide visual representations of garment pieces with all dimensions labeled. These diagrams show you exactly how the finished item should measure at various points. Compare these measurements to a similar garment you already own and love to ensure you’re selecting the right size.
Decoding Knitting Abbreviations
Knitting patterns use abbreviations extensively to conserve space and improve readability. While hundreds of abbreviations exist across all knitting techniques, most patterns use a core set of common terms.
Essential Basic Abbreviations
These fundamental abbreviations appear in virtually every pattern you’ll encounter:
- K = Knit. Execute the basic knit stitch.
- P = Purl. Execute the basic purl stitch.
- CO = Cast on. Create new stitches on your needle to begin work.
- BO = Bind off (also called cast off). Secure stitches to finish an edge.
- St(s) = Stitch(es). The loops on your needle.
- RS = Right side. The front or public-facing side of your work.
- WS = Wrong side. The back or private side of your work.
- Rep = Repeat. Perform the specified action multiple times.
Increase and Decrease Abbreviations
As you progress beyond basic rectangles, you’ll encounter shaping techniques that add or subtract stitches:
- K2tog = Knit two together. A right-leaning decrease that reduces stitch count by one.
- P2tog = Purl two together. Decrease worked on the purl side.
- SSK = Slip, slip, knit. A left-leaning decrease.
- YO = Yarn over. Create an increase by wrapping yarn around the needle, which also creates a decorative hole.
- M1 or M1L/M1R = Make one (left or right). Increase by lifting the strand between stitches and knitting into it.
- Kfb = Knit front and back. Increase by knitting into the same stitch twice.
Understanding Numbers in Abbreviations
Numbers integrated into abbreviations provide crucial information about stitch execution. When you see K3, it means knit three stitches. P5 instructs you to purl five stitches. The number always indicates how many times to perform that action.
Some abbreviations incorporate numbers that describe the technique itself rather than repetitions. K2tog means you insert your needle through two stitches simultaneously and knit them as one—the number two indicates how many stitches are involved in the technique, not how many times you perform it.
Mastering Pattern Symbols and Special Notation
Beyond abbreviations, patterns employ various symbols and notations to communicate complex instructions efficiently. Understanding these conventions prevents confusion and mistakes.
Asterisks: Your Repeat Indicators
Asterisks mark the beginning of sequences that repeat multiple times. When a pattern instructs you to work from an asterisk, you’ll continue repeating that sequence until reaching a specified stopping point.
For example: K3, *P2, K2; rep from * to last 3 sts, P3.
This instruction breaks down as follows: First, knit three stitches. Then, starting at the asterisk, purl two and knit two. Return to the asterisk and repeat that P2, K2 sequence over and over until only three stitches remain on your needle. Finally, purl those last three stitches.
Patterns sometimes use multiple asterisks or double asterisks to indicate nested repeats within larger repeats. Each set of asterisks functions independently, so track them carefully.
Brackets and Parentheses
Square brackets [ ] and parentheses ( ) group instructions together for specific purposes. The meaning depends on context and how the pattern uses them.
Brackets often enclose sequences to repeat a specific number of times:
[K2, P2] 4 times
This means knit two, purl two, then repeat that entire sequence three more times for a total of four repetitions.
Parentheses sometimes contain multiple operations performed into a single stitch:
(K1, P1, K1) into next st
This instruction tells you to work all three operations—knit one, purl one, knit one—into the same stitch, creating an increase.
In multi-size patterns, parentheses or brackets often separate size-specific instructions. A pattern might read: Cast on 60 (70, 80, 90) stitches. The first number applies to the smallest size, the second to the next size up, and so on.
Managing Multi-Size Instructions
Patterns offering multiple sizes present instructions for all sizes simultaneously to conserve space. Learning to track your specific size prevents constant confusion and mistakes.
Before starting, identify which size you’re making and highlight or circle every instance of that size’s instructions throughout the pattern. Many knitters use different colored highlighters for different pattern elements—yellow for their size, pink for special techniques, green for shaping sections.
When you encounter a zero or dash in your size position, that instruction doesn’t apply to your size. Simply skip it and continue to the next instruction. For instance, if the pattern says increase 0 (2, 4, 6) stitches and you’re making the smallest size, you perform no increases at that point.
Following Row-by-Row Instructions
The instruction section forms the heart of any pattern, providing step-by-step directions for creating your project. These instructions flow logically from beginning to end, typically organized by major sections or pattern pieces.
Understanding Row Numbering
Patterns number rows to help you track your progress and identify which instruction to follow. Row 1 typically represents the first row you knit after casting on, though some patterns may consider the cast-on itself as a setup row.
Right side rows and wrong side rows often receive different treatments in a pattern. The designation RS or WS following the row number tells you which side of your work faces you as you complete that row. This matters enormously for texture patterns, where knit stitches on the right side create purl bumps on the wrong side.
Recognizing Stitch Patterns
Many patterns incorporate stitch patterns—repeating sequences that create texture or visual interest. Common examples include ribbing, seed stitch, and garter stitch. Once a pattern establishes a stitch pattern, it might simply instruct you to continue in established pattern rather than repeating the same instructions row after row.
When a pattern says work in stockinette stitch, it assumes you understand that means knitting right side rows and purling wrong side rows. Work in garter stitch means knitting every row. These standard stitch patterns become knitting vocabulary you’ll use repeatedly.
Simultaneous Shaping Instructions
Advanced patterns sometimes require you to perform multiple shaping operations simultaneously—perhaps decreasing for armholes while continuing a lace pattern. These instructions can intimidate beginners, but breaking them into components makes them manageable.
Read through the entire instruction set first to understand what you’re accomplishing. Then, tackle one element at a time. If you need to decrease at both edges while maintaining a cable pattern in the center, focus first on the decreases, then verify your cable pattern. With practice, executing multiple operations simultaneously becomes automatic.
Introduction to Knitting Charts
Knitting charts provide visual representations of stitch patterns using symbols. While they appear intimidating initially, many knitters eventually prefer charts to written instructions because they show exactly how your knitting should look.
Chart Basics and Structure
Each square on a knitting chart represents one stitch. The symbol inside that square indicates which type of stitch to work. A blank square typically represents a knit stitch on right side rows, while other symbols show purls, decreases, increases, or specialty stitches.
Every chart includes a legend or key explaining what each symbol means. Never assume you know a symbol’s meaning without checking the legend, as different designers sometimes use different symbols for the same technique.
Reading Direction in Charts
For flat knitting worked back and forth on straight or circular needles, you read charts differently depending on which side faces you. Right side rows read from right to left, mimicking the direction you work across your needles. Wrong side rows read from left to right, again following your actual knitting direction.
Row numbers typically appear along the chart edges. Right side row numbers appear on the right edge, wrong side row numbers on the left. This visual cue helps you remember which direction to read.
For circular knitting worked in continuous rounds, you always read charts from right to left because you’re always working from the right side. Round numbers consistently appear on the right edge.
Chart Repeats and Boundaries
Charts often include heavy lines or shaded boxes indicating pattern repeats. You might see edge stitches shown separately from a central repeat section. In this case, you work the edge stitches once, repeat the central section as many times as your stitch count allows, then work the opposite edge stitches.
Start with simple charts showing basic stitch combinations before attempting complex lace or cable charts. Practice reading a few rows of a chart alongside written instructions for the same pattern to build confidence in your chart-reading skills.
Special Sections and Pattern Notes
Beyond the main instruction body, patterns include various supplementary sections that provide crucial information for project success.
Pattern Notes and Designer’s Tips
The notes section contains designer insights, construction method explanations, and special technique clarifications. Never skip reading pattern notes—they often contain critical information that prevents major mistakes.
Designers use notes to explain unusual construction methods, suggest modifications, alert you to tricky sections, or clarify potentially confusing instructions. A pattern might note that the garment is worked from the top down, or that a particular stitch pattern shifts on wrong side rows. This information helps you understand the overall project architecture before you begin.
Stitch Glossaries and Technique Explanations
Well-written patterns include glossaries defining specialized stitches or techniques specific to that project. If a pattern uses an unusual decrease method or a special cable technique, the glossary explains exactly how to execute it.
Some patterns provide full photo tutorials or link to online videos demonstrating complex techniques. Take advantage of these resources before you need them. Practicing a new technique on a swatch before encountering it in your actual project prevents frustration and mistakes.
Assembly and Finishing Instructions
Patterns for garments or multi-piece projects include assembly diagrams and seaming instructions. These sections explain how to join pieces, pick up stitches for borders, and add finishing touches like button bands or collars.
Blocking instructions may appear in the finishing section. Blocking involves washing and shaping your finished knitting to final dimensions. Different fibers require different blocking methods, so follow pattern recommendations carefully.
Practical Tips for Pattern Reading Success
Beyond understanding pattern components, certain practices dramatically improve your pattern-reading experience and reduce errors.
Pre-Reading Your Pattern
Read through the entire pattern before casting on. This preview reveals the project’s scope, identifies unfamiliar techniques requiring research, and helps you understand the construction method. You’ll spot potential challenges and can prepare accordingly.
Create a photocopy or print digital patterns so you can mark them up freely. Highlight your size throughout. Underline sections where you tend to make mistakes. Add checkmarks to completed rows. Write notes in margins about modifications or adjustments you made. Your marked-up pattern becomes a personalized guide tailored to your knitting style.
Tracking Your Progress
Use row counters, either physical clickers or smartphone apps, to track completed rows. This simple tool prevents the frustration of losing your place in complex patterns.
Sticky notes work beautifully for marking your current position in written patterns. Place the note just below the row you’re working so you can see the current instruction while blocking out rows below that might confuse you.
For chart reading, magnetic boards with strips hold your pattern and a magnetic ruler highlights the current row. Alternatively, photocopy charts and cross off completed rows with a pencil.
Seeking Clarification and Help
When pattern instructions confuse you, first check Ravelry for that specific pattern. Other knitters often post clarifying questions and the designer’s responses in the pattern’s project page. You might discover that dozens of knitters shared your exact confusion and someone already received clarification.
Online knitting communities welcome questions from beginners. Include the pattern name, the specific confusing instruction, and what you’ve already tried when asking for help. Clear photos of your work often help experienced knitters diagnose issues quickly.
Local yarn shops frequently offer help sessions or classes specifically for working through pattern difficulties. Building relationships with more experienced knitters provides invaluable support as you develop your skills.
Building Confidence Through Practice
Learning to read knitting patterns fluently doesn’t happen overnight. Like learning any new language, it requires patience, practice, and repeated exposure to become comfortable and automatic.
Start with patterns specifically labeled as beginner-friendly. These patterns use simpler constructions, explain techniques more thoroughly, and employ fewer abbreviations. As your confidence grows, gradually tackle more complex patterns that introduce new abbreviations and techniques.
Keep an abbreviation reference list handy during your first several projects. Eventually, common abbreviations like K2tog, YO, and RS become instantly recognizable. You’ll find yourself reading pattern instructions as fluently as you read English.
Don’t let fear of reading patterns delay your progress. The only way to become comfortable with patterns is to use them. Every pattern you complete builds your vocabulary and confidence. Before long, those mysterious codes transform into clear, logical instructions that open unlimited knitting possibilities.
Remember that every accomplished knitter once struggled to decipher their first pattern. The difference between a beginner and an experienced pattern reader isn’t innate talent—it’s simply accumulated practice and familiarity. Give yourself permission to learn gradually, celebrate small victories, and enjoy the journey of expanding your knitting capabilities.
Frequently Asked Questions About Reading Knitting Patterns
Do I need to know how to read patterns to start knitting?
No, you can absolutely learn basic knitting without patterns initially. Many beginners start with simple projects like scarves or dishcloths that require only casting on, knitting every row, and binding off—no pattern necessary. However, learning to read patterns significantly expands your knitting horizons. Once you master basic stitches, investing time in pattern-reading skills allows you to create shaped garments, follow complex stitch patterns, and replicate designs created by other knitters. Think of it as learning to read music after mastering a few songs by ear—the new skill opens vast creative possibilities.
What should I do if my pattern doesn’t include an abbreviation key?
Older patterns or those from certain publications sometimes omit abbreviation glossaries. When this happens, refer to standardized abbreviation lists from organizations like the Craft Yarn Council. These resources compile the most common abbreviations with clear definitions. You can also search for the specific abbreviation online—most knitting websites maintain comprehensive glossaries. If you encounter a particularly unusual abbreviation not found in standard references, try contacting the pattern designer or publisher directly for clarification. Many designers maintain websites or social media presence and respond helpfully to questions.
How do I choose which size to make in a multi-size pattern?
Select your size based on finished garment measurements, not the size labels. Measure a similar garment you own that fits the way you want your new project to fit. Compare those measurements to the finished measurements listed in the pattern, paying particular attention to the chest or bust circumference for tops and sweaters. Remember that most garments include ease—extra room beyond your actual body measurements. The pattern notes should specify how much ease is intended. A sweater with 2-4 inches of positive ease will fit loosely and comfortably, while one with negative ease will fit snugly. Consider your personal fit preferences and the intended use of the garment when making your size selection.
Can I substitute different yarn than what the pattern recommends?
Yes, you can substitute yarn, but successful substitution requires careful attention to several factors. Match the yarn weight category exactly—substituting worsted weight for chunky will produce a dramatically different result. Compare the recommended yardage and purchase enough of your substitute yarn to meet or exceed that amount. Most critically, knit a gauge swatch with your substitute yarn and adjust needle size until you match the pattern gauge precisely. Be aware that different fiber contents behave differently—substituting cotton for wool changes drape, elasticity, and warmth, even if you match gauge perfectly. When substituting yarn for your first few projects, stick closely to similar fiber contents until you develop intuition for how different yarns perform.
Why do some patterns use charts while others use written instructions?
Designers choose between charts and written instructions based on the pattern type and their target audience. Charts excel at showing complex stitch patterns like lace or cables because they visually represent how your knitting should look. Many experienced knitters prefer charts because they’re faster to read and errors become immediately visible when your knitting doesn’t match the chart image. Written instructions work better for beginners or for patterns with primarily simple stitches. Some patterns provide both formats, allowing you to choose your preferred method. Regional preferences also play a role—Japanese patterns traditionally use charts almost exclusively, while American patterns more often feature written instructions. Neither format is superior; they simply represent different ways of communicating the same information.
What does it mean when a pattern says to work in established pattern?
This instruction assumes you recognize and can continue a stitch pattern that has already been set up in previous rows. For example, if you’ve been working several rows of ribbing that alternates K2, P2 across the row, the pattern might simply say continue in established ribbing rather than writing out K2, P2 for every subsequent row. To work in established pattern, observe your knitting and maintain the pattern you see—knit the knit stitches and purl the purl stitches. This instruction tests your ability to read your knitting and understand the pattern structure. If you lose track of where you are in the pattern, count back to a row with full instructions and work forward from there to reestablish your place.
How important is it really to check gauge?
Gauge importance varies by project type. For items where finished size matters—garments, hats, mittens, socks—checking gauge is absolutely critical. A gauge discrepancy of just one stitch per four inches can result in several inches of size difference in a finished sweater. For projects like scarves, blankets, or dishcloths where exact dimensions are flexible, gauge matters less. However, even for these projects, matching gauge ensures you purchase the correct amount of yarn. If your gauge is significantly tighter than the pattern, you’ll need more yarn than specified to achieve similar dimensions. The fifteen minutes spent knitting and measuring a gauge swatch can save hours of frustration from a finished garment that doesn’t fit, making it one of the most valuable investments in your project’s success.
What should I do if I find an error in a knitting pattern?
First, verify that what you’ve identified is actually an error rather than a misunderstanding on your part. Check the pattern’s Ravelry page or designer’s website for errata—published corrections for known errors. Many designers maintain lists of corrections and updates for their patterns. If you can’t find confirmation of the error, reach out to the designer with specific details about the problem and what row or section it affects. Online knitting communities can also help verify whether you’ve found a genuine error or whether the instruction makes sense in context you’re missing. When working around a confirmed error, try to understand the design intent and adjust the instruction logically to achieve the desired result. Document your modification in case you or others knit the pattern again.
Are vintage knitting patterns harder to read than modern ones?
Vintage patterns often present unique challenges for modern knitters. Older patterns may use outdated terminology or abbreviations that differ from current standards. Yarn weight systems have changed, making it difficult to identify suitable modern yarn substitutes. Vintage patterns sometimes provide less detailed instructions, assuming knitters possessed certain baseline knowledge. However, the basic structure remains similar to modern patterns. When working with vintage patterns, research any unfamiliar terms in historical knitting references. Online communities dedicated to vintage knitting can provide invaluable guidance for interpreting older patterns. The extra effort required to decode vintage patterns often rewards you with unique designs and construction methods rarely seen in contemporary patterns.
How can I practice reading patterns without starting a full project?
Practice pattern reading by downloading free patterns and working through them on paper without actually knitting. Read the pattern as though planning to knit it—identify materials needed, highlight your size, calculate how many pattern repeats fit across a row, sketch how different sections connect. This mental rehearsal builds pattern literacy without the time commitment of full projects. Additionally, knit small swatches following different pattern instructions—one square in seed stitch following written instructions, another practicing a simple lace chart. These practice swatches require minimal time and yarn but provide valuable experience interpreting different instruction formats. Many knitting books include stitch pattern dictionaries with dozens of patterns in both chart and written form, offering excellent practice opportunities for developing your reading skills.