
How to knit a hat for beginners is one of the most searched knitting topics and for good reason. A knitted hat is warm, practical, and makes a wonderful handmade gift. Best of all, it’s one of the most satisfying beginner knitting projects you can tackle.
If you’ve already made a scarf, you’re more than ready for this next step. And if this is your very first knitting project, don’t worry this guide will walk you through everything from casting on to finishing the crown.
Why Knitting a Hat Is Great for Beginners
A beginner hat knitting pattern is a fantastic step up from a simple scarf. It introduces you to knitting in the round, basic shaping, and decreases all skills you’ll use in nearly every intermediate project down the road.
Hats also knit up relatively quickly. With a worsted weight yarn and the right needles, most beginners can finish their first hat in just a few evenings. That quick progress keeps you motivated and excited to keep learning new knitting stitches.
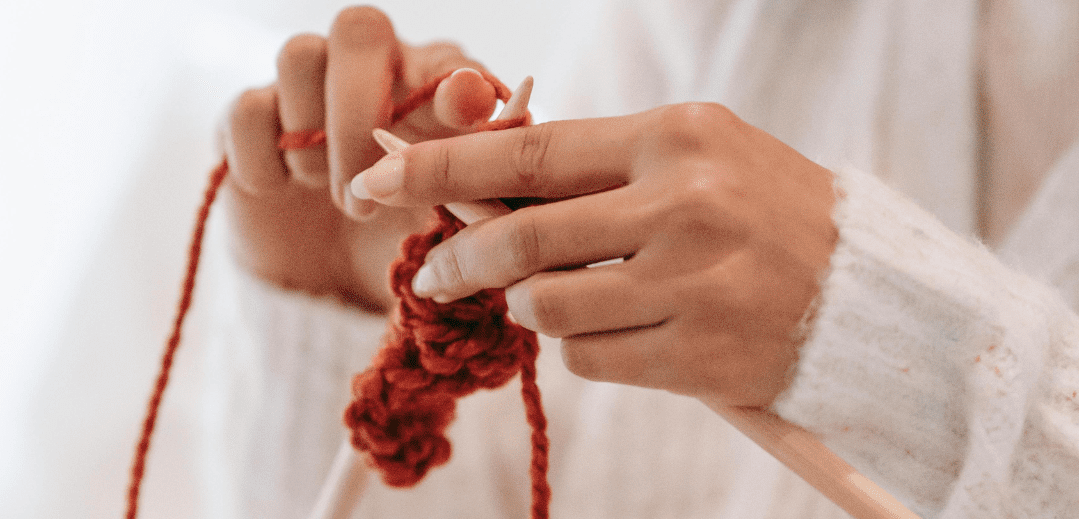
What You Need to Knit Your First Hat
For this easy knitting pattern, you’ll need a set of circular knitting needles in size US 7 or US 8, or a set of double-pointed needles if you prefer. One skein of worsted weight yarn is usually enough for an adult hat.
Choose a smooth, medium-weight yarn in a color you love something that makes you happy to work with every stitch. Avoid anything too fuzzy or textured, as it makes it harder to see your knitting stitches clearly, especially when you’re still learning.
“As someone who has spent years exploring different knitting techniques and patterns, I always enjoy sharing simple tips and practical ideas that can help knitters of all levels create beautiful projects”
Casting On for a Knitted Hat
Every hat starts with casting on the right number of stitches. For an average adult head (about 22 inches in circumference), casting on 80 to 100 stitches on circular needles works well with worsted weight yarn.
The long tail cast on is a great choice here it creates a stretchy, neat edge that works beautifully for hat brims. If you haven’t tried it yet, this step-by-step guide will get you started: Knitting Cast On – Long Tail Complete Guide.
Starting with Ribbing: The Hat Brim
When knitting a hat, the brim is usually the first section of the project. Most knitters begin with a ribbing pattern because it creates a flexible and comfortable edge that fits snugly around the head. Ribbing also gives the hat a clean and professional finish while helping it stay in place when worn.
Why Ribbing Is Important for a Hat Brim
Ribbing is commonly used at the beginning of knitted hats because it provides elasticity. This stretch allows the hat to fit different head sizes without feeling too tight or too loose. The alternating knit and purl stitches create a fabric that can expand and return to its original shape easily.
In addition to comfort, ribbing also improves the structure of the hat brim. It helps prevent the edge from curling and gives the hat a polished look. For beginners and experienced knitters alike, ribbing is one of the most reliable ways to start a hat project.
Common Ribbing Patterns for Knitted Hats
There are several ribbing patterns that knitters use when making hat brims. The most common options are simple, easy to memorize, and highly effective.
Some popular ribbing patterns include:
- 1×1 Rib: alternating one knit stitch and one purl stitch
- 2×2 Rib: alternating two knit stitches and two purl stitches
- Twisted Rib: similar to 1×1 rib but with a slightly tighter and more decorative texture
Each pattern creates a slightly different look and level of stretch. Beginners often start with 1×1 or 2×2 rib because these patterns are easy to follow and work well for most hat designs.
How Many Rows of Ribbing to Knit
The number of ribbing rows depends on the style of the hat you want to create. For many knitted hats, knitters work between 1 and 2 inches of ribbing before moving on to the main body of the hat.
If you want a folded brim, you may choose to knit 3 to 4 inches of ribbing so the edge can fold comfortably. A shorter ribbing section creates a simpler and more lightweight hat design.
Choosing the right ribbing length helps balance comfort, warmth, and style in your finished project.
Tips for Keeping the Hat Brim Stretchy and Comfortable
To make sure your hat brim stays stretchy and comfortable, there are a few helpful knitting tips to keep in mind.
First, avoid knitting too tightly. Tight stitches can reduce the natural stretch of ribbing and make the hat feel uncomfortable. Using the recommended needle size for your yarn can help maintain the right tension.
Second, maintain a consistent rhythm when alternating knit and purl stitches. This keeps the ribbing pattern even and improves the overall appearance of the hat.
Finally, choose yarn that has a bit of natural elasticity, such as wool or wool blends. These yarns help the ribbing maintain its shape and provide a better fit for everyday wear
Shaping the Crown: Your First Decrease
Crown shaping is done using decreases a technique that reduces the number of stitches on your needle to close the top of the hat. The most common decrease used here is K2tog, which means knitting two stitches together as one.
A simple decrease round for a hat looks like this: K8, K2 tog, repeat from around. Then knit a plain round. Keep alternating decrease rounds and plain rounds, reducing the number of stitches between each K2tog each time, until you have about 8 to 10 stitches left on the needle.
Finishing the Top of Your Hat
Once you have only a few stitches remaining, cut your yarn leaving a 10-inch tail. Thread the tail onto a tapestry needle and run it through all the remaining live stitches on the needle. Slide them off and pull the yarn snugly to close the top of the hat.
Weave in both yarn ends securely on the inside of the hat. Then try on your finished piece and admire your work you just knitted a hat!
For more on finishing techniques, this beginner guide is a great next read: How to Knit for Beginners – Learn the 3 Essential Stitches Today.
Common Mistakes When Knitting a Hat

One of the most common issues beginners face when knitting a hat is twisted stitches on the first round after joining to knit in the round. Always double-check that all your cast-on stitches are facing the same direction before you start your first round.
Another common mistake is losing track of where your round begins. Use a stitch marker to mark the start of each round it’s a tiny tool that saves a lot of confusion.
For a full list of beginner knitting mistakes and how to fix them: Common Knitting Mistakes Beginners Make and How to Fix Them.
Fun Variations to Try on Your Next Hat
Once you’ve finished your first beginner hat knitting pattern, there are so many fun ways to customize your next one. Try adding a pompom on top, switching to a different yarn color for the brim, or experimenting with a simple cable panel down the front.
You can also try knitting a slouchy hat by simply casting on more stitches or working the body a little longer before decreasing. Each variation teaches you something new and keeps your knitting practice feeling fresh and exciting.
Keep Building Your Skills One Project at a Time
Every project you complete makes the next one easier. A hat after a scarf, a cowl after a hat that’s how confident knitters are built. Keep practicing your basic knitting stitches, explore new easy knitting patterns, and enjoy every step of the journey.
For everything you need to know as a new knitter in one place, check out the full guide: Knitting for Beginners – Your Easy Start Guide. And if you want to explore more knitting patterns and project ideas, Ravelry is a wonderful free community full of inspiration. 🧶