If you have been scrolling through knitting videos and wondering where to start — you are in exactly the right place. Learning how to knit for beginners feels overwhelming at first glance, but the truth is simpler: every sweater, scarf, and blanket you have ever admired was built from just a handful of basic stitches. Master those, and the rest follows naturally.
In this guide, you will learn the three stitches every beginner must know: the Knit Stitch, the Purl Stitch, and the Garter Stitch plus exactly when and why to use each one. By the end, you will have everything you need to start your very first project today.
What Does “Knitting” Actually Mean?
Knitting is the process of creating fabric by interlocking loops of yarn using two needles. Each loop is called a stitch, and the way you form those loops determines the texture, stretch, and look of your finished piece. Two directions of looping — forward and backward — give you the knit stitch and the purl stitch respectively. Everything else in knitting is simply a combination of these two.
A common beginner question: do I need to know both stitches before starting a project? No. You can knit an entire scarf using only the knit stitch. Many experienced knitters still use single-stitch projects as a way to relax. Start with one stitch, build confidence, and add the second when you are ready.
What You Need Before You Start
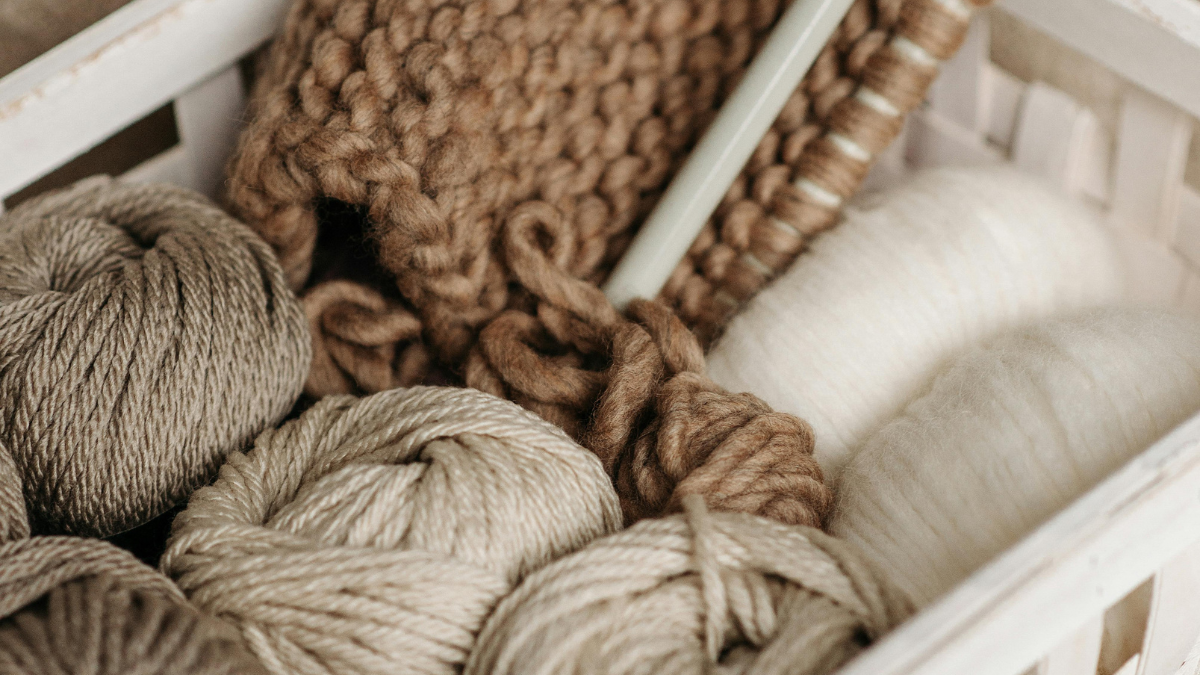
You only need two things to begin: yarn and needles. That is it. No complicated tools, no expensive equipment.
For yarn, choose a medium-weight worsted or aran yarn in a smooth, light colour. Light colours let you see each stitch clearly — a small detail that makes a big difference when you are still learning. Avoid fuzzy, textured, or dark yarns for now; they make it nearly impossible to count stitches or spot mistakes.
For needles, bamboo or wooden straight needles in size US 7 to US 9 (4.5mm to 5.5mm) are ideal for beginners. Unlike metal needles, bamboo grips the yarn slightly, keeping stitches from sliding off while you find your rhythm. Check the label on your yarn — it will suggest a needle size. Follow that recommendation and you will be off to a strong start.
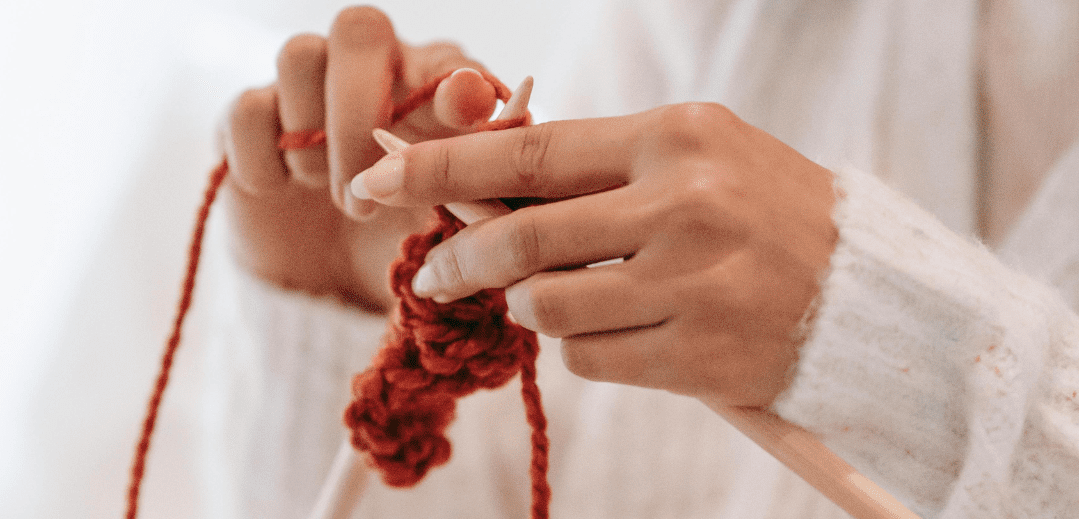
Stitch 1: The Knit Stitch (Your Starting Point)
The knit stitch is the foundation of all knitting. It creates a smooth, V-shaped texture on the front of your fabric and is the first stitch every beginner learns. Once you know it, you can make scarves, dishcloths, and simple blankets with no additional techniques at all.
The motion is sometimes called “in through the front door, run around the back, out through the window, off jumps Jack” — a rhyme that captures all four steps perfectly.
Step-by-Step: The Knit Stitch
- Hold the needle with your cast-on stitches in your left hand. Hold the empty needle in your right hand.
- Insert the right needle into the first stitch on the left needle, going in from left to right — the tip of the right needle should point upward and cross behind the left needle.
- Wrap the working yarn counterclockwise around the right needle tip.
- Pull the right needle back through the stitch, bringing the wrapped yarn with it to form a new loop on the right needle.
- Slide the original stitch off the left needle. You have completed one knit stitch.
- Repeat Steps 2 through 5 across all stitches until the row is complete. Then swap needles — the full one goes to your left hand — and begin the next row.
The most common beginner mistake with the knit stitch is inserting the needle into the wrong part of the stitch — specifically, going in from right to left instead of left to right. This creates a twisted stitch that looks different from its neighbours. If your stitches look crossed, check your needle entry point before each stitch.
⏱️ Practice tip: Cast on 15 stitches and knit 20 rows using only the knit stitch. This gives you a small fabric swatch and builds muscle memory faster than anything else.
Stitch 2: The Purl Stitch (The Mirror Image)
The purl stitch is the knit stitch worked in reverse — literally the same motion, just approached from the opposite direction. On its own, it creates a bumpy, horizontal texture. Combined with the knit stitch, it opens up an entire world of patterns: ribbing, seed stitch, stockinette, and more.
Most beginners find purl slightly trickier at first because the yarn is held in front of the work instead of behind. This feels awkward for a day or two, then becomes completely natural.
Step-by-Step: The Purl Stitch
- Hold the needle with your stitches in your left hand. Bring the working yarn to the front of your work, between the two needles.
- Insert the right needle into the first stitch on the left needle, going in from right to left — the right needle tip should point downward in front of the left needle.
- Wrap the working yarn counterclockwise around the right needle tip, keeping it in front.
- Pull the right needle back through the stitch, bringing the wrapped yarn through to form a new loop on the right needle.
- Slide the original stitch off the left needle. One purl stitch complete.
- Repeat Steps 2 through 5 across all stitches to finish the row.
The most common beginner mistake with the purl stitch is forgetting to bring the yarn to the front before inserting the needle. If you do this, the yarn wraps incorrectly and the stitch becomes tangled. Before every purl stitch, pause and confirm the yarn is in front — it takes two seconds and prevents a lot of frustration.
Stitch 3: The Garter Stitch (Your First Complete Fabric)
Garter stitch is not a separate motion it is a pattern created by knitting every row using only the knit stitch. The result is a squishy, reversible fabric with horizontal ridges that looks the same on both sides. It is the easiest complete fabric a beginner can make and the go-to choice for first scarves, dishcloths, and simple squares.
Because garter stitch is worked entirely in the knit stitch, it is the ideal first project once you have practised the knit stitch in isolation.
How to Work Garter Stitch
- Cast on your desired number of stitches.
- Knit every stitch of every row without exception.
- Continue until your piece reaches the desired length, then bind off.
That is the complete pattern. No row changes, no switching between stitches, no pattern reading required. Two ridges of garter stitch = two rows of knitting, which makes counting your progress easy.
A practical detail: garter stitch fabric naturally wants to curl in at the edges if the tension is very tight. If you notice this, relax your grip and allow the stitches to form a little more loosely. A blocked or washed swatch will also lie flat more readily.
Which Stitch Should You Learn First?
Start with the knit stitch, without question. It is simpler, faster to learn, and immediately useful — you can knit an entire project using nothing else. Once the knit stitch feels natural (usually within one or two practice sessions), move on to the purl stitch. Combine both and you unlock stockinette fabric, ribbing, and dozens of textured patterns.
Use the knit stitch for: garter stitch scarves, dishcloths, simple blankets, and any flat project where texture is not the priority. Use the purl stitch for: stockinette fabric (alternating knit and purl rows), ribbed cuffs and necklines, and seed stitch. Use garter stitch for: your very first project — it is forgiving, reversible, and satisfying to make.
Frequently Asked Questions About Knitting for Beginners
How long does it take to learn to knit? Most beginners can work a basic knit stitch after 30 to 60 minutes of practice. The purl stitch typically takes another session or two to feel comfortable. By the end of your first weekend, you can realistically complete a small garter stitch swatch. Full confidence across both stitches usually comes within two to three weeks of regular practice.
Why do my stitches keep falling off the needle? This usually happens when stitches are worked too loosely or the needle is tilted downward while knitting. Keep your working needle roughly level and make sure new stitches sit snugly — but not tightly — on the needle after each step. Bamboo needles reduce this problem significantly because they grip the yarn better than metal.
Does it matter which hand I knit with? Standard knitting holds the work in the left hand and works with the right, but left-handed knitters often mirror this comfortably. The most important thing is that your tension — how loosely or tightly you hold the yarn — stays consistent regardless of which hand leads.
What is the difference between knit and purl? The knit stitch inserts the needle from left to right with the yarn held behind the work. The purl stitch inserts the needle from right to left with the yarn held in front. They produce opposite textures: knit is smooth and V-shaped; purl is bumpy and horizontal.
Can I knit without a pattern as a beginner? Absolutely. Garter stitch requires no pattern at all — you simply knit every row until the piece is as long as you want it. Many experienced knitters still enjoy pattern-free “mindless knitting” for exactly this reason. A simple garter scarf is the perfect first project: cast on 20 stitches, knit every row, and stop when you run out of yarn.
Why does knitting feel so slow at first? Because it is a motor skill, and all motor skills feel slow before the movements become automatic. The speed comes with repetition, not effort. Most beginners see a significant improvement in pace after just a few hours of total practice time spread across several days.
Conclusion
Learning how to knit for beginners comes down to three things: the knit stitch, the purl stitch, and the patience to practise both until they feel natural. The knit stitch is your entry point — simple, satisfying, and immediately usable in real projects. The purl stitch is your second tool, and once you have both, the rest of the craft opens up stitch by stitch.
The most effective thing you can do right now is pick up your needles, cast on 15 stitches, and knit one row. Then another. Muscle memory builds faster than most beginners expect, and within a single sitting the motion will already start to feel familiar. That first moment when knitting clicks — when your hands move without thinking — is one of the most satisfying feelings in any craft.
Every experienced knitter started exactly where you are now. The only difference is that they kept going.
Comments are closed.